Teredo Tunnel Simulation
Internet Protocol version 6 (IPv6), the most recent version of the Internet Protocol, was developed by the IETF to deal with the long-anticipated problem of IPv4 address exhaustion. Despite being superior to IPv4 in multiple aspect (e.g. larger address space, extension headers), IPv6 has not been widely adopted, although it has been semi-standardized in 1998 and fully-standardized in 2017.1
During the transition period, teredo tunneling has been used to give IPv6 connectivity for IPv6-capable hosts that are on the IPv4 Internet but have no native connection to an IPv6 network.2 In this article, I will demontrate a way to set up such tunnel up on virtual machines, then examine the packets being sent by IPv6 nodes connected by the tunnel.
Configuration
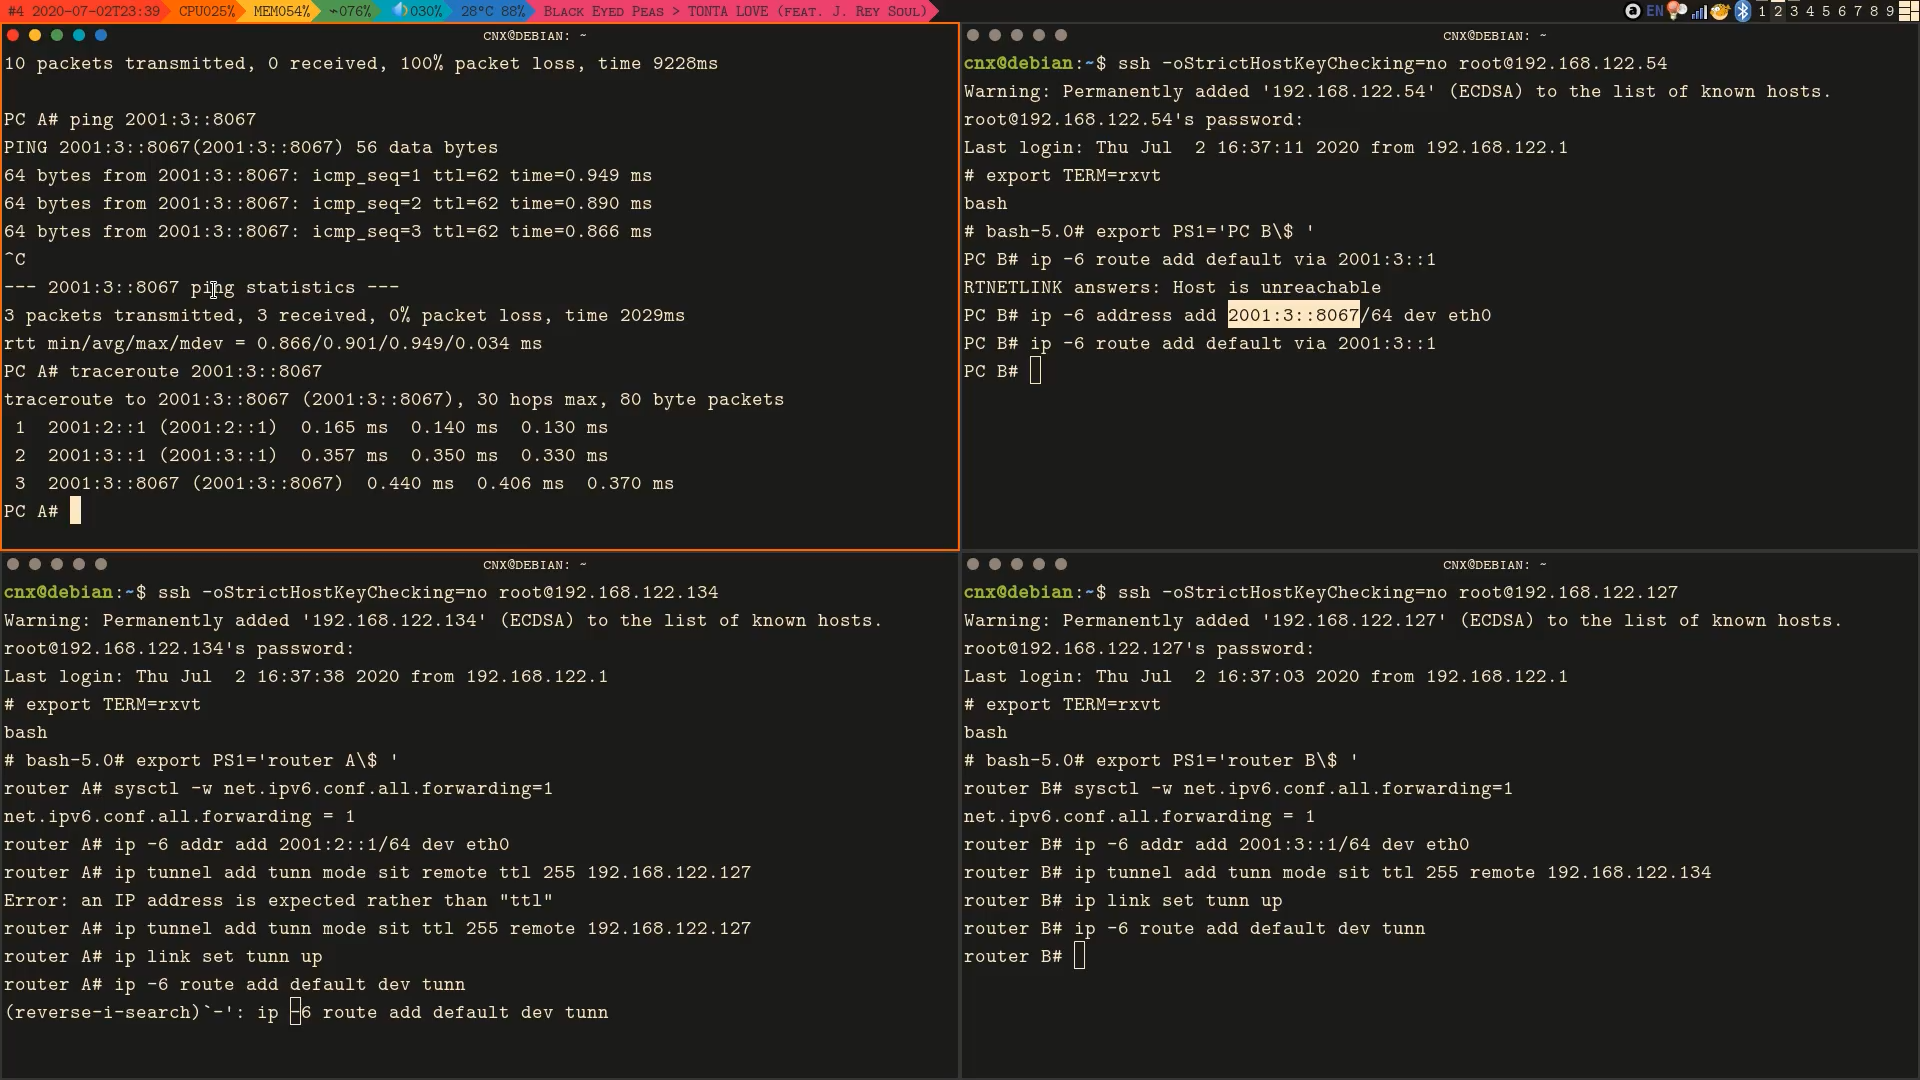
Virtual Machines
In order to simulate Teredo tunneling, one needs two IPv6 nodes and two routers
with both IPv4 and IPv6 access. In total, there needs to be four
virtual machines to be set up, thus I went for Void Linux, which is known
for its low memory foot print thanks to using runit instead of systemd.
To minimize resource usage and speed up the setup process, I chose the barebone
live image which uses musl instead of glibc. At boot, the image uses only
40 MB of memory.
For virtualization, I used vert-manager, simply because it is available
in Debian’s repository (my host OS). For some reason, on amd64, the kernel
refuses to boot until I give it over 200 MB, but apparently that is still
a really modest number. Networking is provided to the guest OSes via NAT
with default configurations.
It is worth mentioning that through virtio, one may use SSH to log into
the guests systems from the host OS. I find this especially convenient as
it enables me to copy and paste not only commands but also IP addresses between
host and guests as well as between guests.
For convenience, from now on, the outside nodes will be referred to as PC A and
PC B, on the other hand the routers are named Router A and Router B. Upon boot,
they were given an Ethernet interface eth0 with the following addresses.
| Node | MAC address | IPv4 address |
|---|---|---|
| Router A | 52:54:00:f0:85:c7 |
192.168.122.127 |
| Router B | 52:54:00:2b:01:cc |
192.168.122.134 |
| PC A | 52:54:00:3b:82:36 |
192.168.122.86 |
| PC B | 52:54:00:7b:ed:c0 |
192.168.122.255 |
Local IPv6 addresses were also given but we are not going to need them.
Teredo Tunnel Setup
First, I set up a IPv4 tunnel between the two routers:
# On Router Aiptunneladdtunnmodesitremote192.168.122.134ttl255iplinksettunnup# On Router Biptunneladdtunnmodesitremote192.168.122.127ttl255iplinksettunnup
For this tunnel to be able to act as a Teredo one, the two routers needs
to have IPv6 addresses prefixed by 2001::/32.2
# On Router Aip-6addradd2001:2::1/64deveth0# On Router Bip-6addradd2001:3::1/64deveth0
Finally, I fellback all IPv6 lookups to the tunnel and enabled IPv6 forwarding:
ip-6routeadddefaultdevtunnsysctl-wnet.ipv6.conf.all.forwarding=1
Teredo Tunnel Usage
The IPv6 addresses of the PCs were set up as follows
(0x8067 is PC in ASCII).
# On PC Aip-6addressadd2001:2::8067/64deveth0# On PC Bip-6addressadd2001:3::8067/64deveth0
By giving both Router A and PC A addresses prefixed by 2001:2::/64
(similarly for Router B and PC B), I implied that they can find each other
through the local IPv6 network, for example on PC B:
$ ip -6 route | head -n1
2001:3::/64 dev eth0 proto kernel metric 256 pref medium
To use the newly created tunnel, the PCs simple had to be routed directly to the routers:
# On PC Aip-6routeadddefaultvia2001:2::1# On PC Bip-6routeadddefaultvia2001:3::1
The connection could then be verified by running on PC A:
$ traceroute 2001:3::8067
traceroute to 2001:3::8067 (2001:3::8067), 30 hops max, 80 byte packets
 1  2001:2::1 (2001:2::1)  0.572 ms  0.441 ms  0.328 ms
 2  2001:3::1 (2001:3::1)  0.906 ms  0.888 ms  1.049 ms
 3  2001:3::8067 (2001:3::8067)  1.325 ms  1.174 ms  1.091 ms
Analysis
To gain further understanding on how packets are transferred over the Teredo tunnel, I captured and took a closer look at some of them.
Packets Capturing
Fortunately for me3, all traffic of guests OSes were wired
to an separate interface named virbr0. To capture going through
the tunnel, I simply had to tell Wireshark to listen to the interface,
while letting PC A ping PC B though IPv6: ping -c1 2001:3::8067.
I then skimmed through the packets sent between the two nodes and looked for
the IPv6-in-IPv4 ones.
Packet Contents
Catured IPv6-in-IPv4 looks exactly like how I would imagined it to be. The content of the ping request can be partially decoded as follows.
Ethernet Header
-
52 54 00 2b 01 cc: MAC address of Router B (destination) -
52 54 00 f0 85 c7: MAC address of Router A (source) -
08 00: EtherType of IPv4
IPv4 Header
-
45 00 00 7c 9b 43 40 00 ff: Some flags -
29: Protocol of IPv6 -
69 be: Checksum -
c0 a8 7a 86: IPv4 address of Router B (destination) -
c0 a8 7a 7f: IPv4 address of Router A (source)
IPv6 Header
-
60 00 07 e7 00 40: Some flags -
3a: Next header (ICMPv6) -
3f: Hop limit of 63 -
20 01 00 02 00 00 00 00 00 00 00 00 00 00 80 67: PC A’s IPv6 address -
20 01 00 03 00 00 00 00 00 00 00 00 00 00 80 67: PC B’s IPv6 address
ICMPv6
-
80: Type of ping request -
00 cf be 03 d9 00 01: Some flags -
e3 0d fe 5e 00 00 00 00 bc d6 0e 00 00 00
00 00 10 11 12 13 14 15 16 17 18 19 1a 1b 1c 1d
1e 1f 20 21 22 23 24 25 26 27 28 29 2a 2b 2c 2d
2e 2f 30 31 32 33 34 35 36 37
: Binary data to be echoed
Conclusion
Via the activities elaborated above, the procedure to set up a Teredo tunnel and the content of the packets travelling through it could be well understood. These understanding may help facilite the adoption of IPv6, even for IPv6 nodes having no native connection to an IPv6 network. I hope that the IPv6 will grow fast enough that I can see the day measures like this tunnel can soon be deprecated.
Comments
Follow the anchor in an author’s name to reply. Please read the rules before commenting.
:comments: